Terrariums
How to Build a Closed Moss Terrarium from Scratch
A sealed glass jar, a handful of moss and a few centimetres of soil: that is the whole shopping list. Once closed, a moss terrarium runs its own small weather system — water evaporating from the substrate, condensing on the glass, trickling back down. Get the layers right at the start and it will sit on a shelf for months, needing almost nothing. Get them wrong and you will be scraping mould off the glass by week two. Here is the build, in the order you will actually do it.
Choosing a jar that suits moss
Glass first, moss second. Almost any clear container can work, but a few features separate an easy build from a fiddly one.
- A wide mouth. You need to fit a hand, or at least a spoon and a pair of long tweezers, inside. Narrow-necked bottles look lovely and are miserable to plant.
- A proper seal. Clip-top jars with a rubber gasket, or apothecary jars with a ground-glass lid, hold humidity far better than a jar with a loose cork.
- Two to four litres. Very small jars dry out and overheat quickly; very large ones get heavy once filled with grit and soil.
- Clear, unscratched glass. You will spend a lot of time looking through it.
Old sweet jars, preserving jars, laboratory jars and glass biscuit barrels all do the job. Wash whatever you choose with hot soapy water, rinse thoroughly, and let it dry completely before you begin.
Building the layers from the bottom up
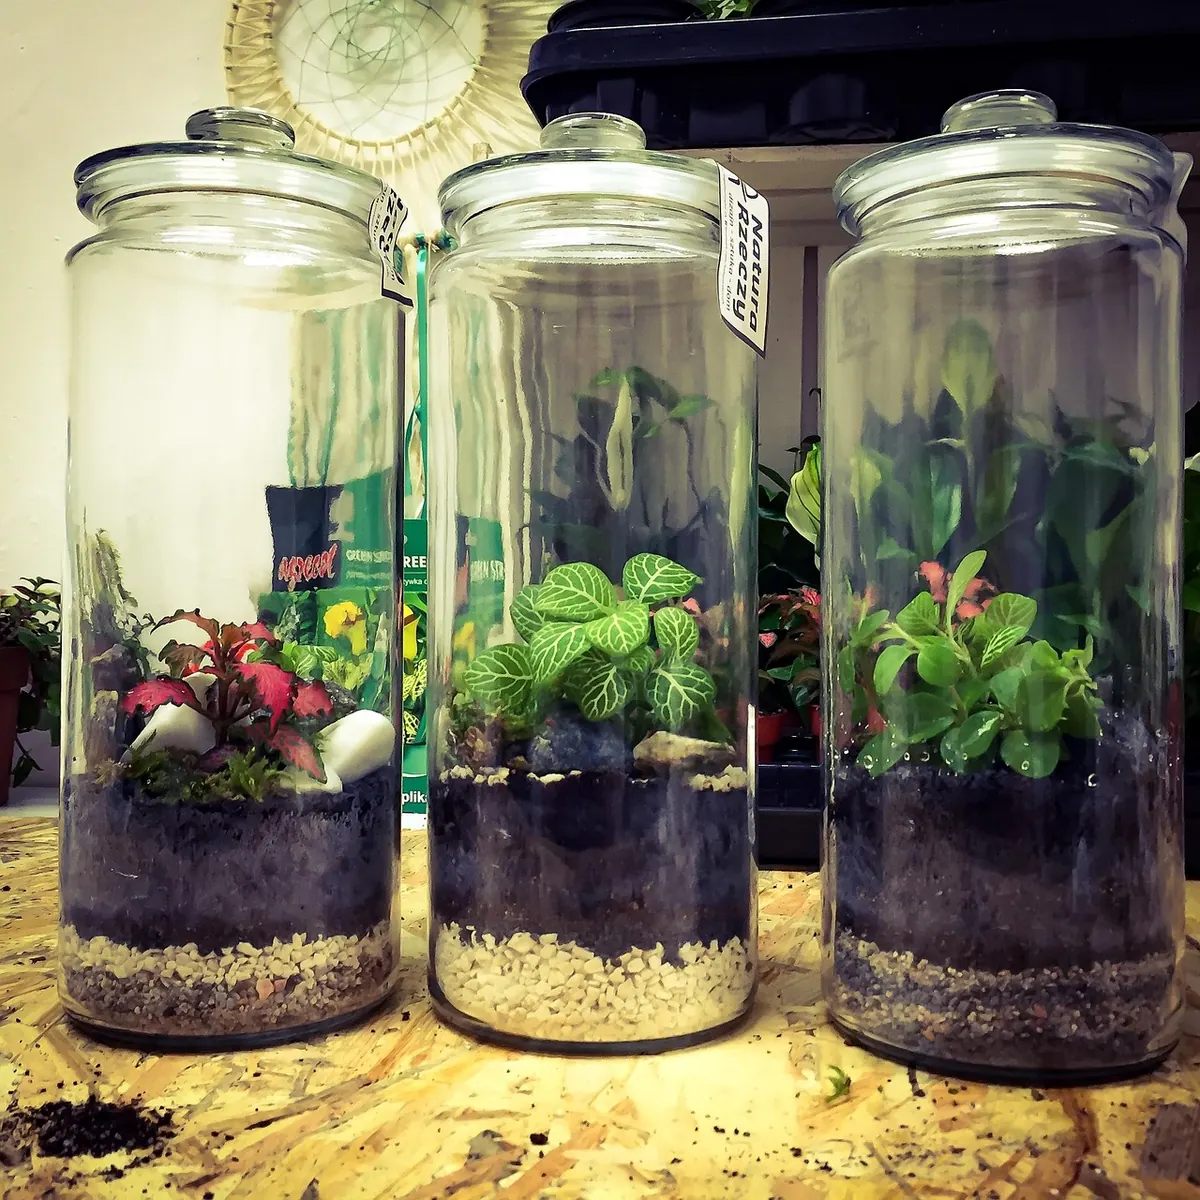
A closed terrarium has no drainage holes, so the bottom of the jar has to do that work instead. Build in this order and the moss will never sit in stagnant water.
- Drainage, 2–3 cm. Pea gravel, horticultural grit or small washed pebbles. Tap the jar gently to level it.
- Charcoal, a thin dusting. A few millimetres of activated charcoal granules helps keep the air inside sweet. Not essential, but cheap, and it forgives small mistakes.
- A barrier. A single layer of sphagnum moss or a circle of landscape fabric stops soil trickling down into the gravel, which would undo step one.
- Substrate, 4–6 cm. Use a peat-free mix that holds moisture but still drains: roughly two parts houseplant compost or coir, one part fine bark or leaf mould, one part grit or perlite. Press it down lightly, leaving a centimetre of clear glass above the soil line so moss stays off the sides.
Moist, not sodden. If you can squeeze a drop of water out of a fistful of the mix, it is too wet for moss.
Choosing moss for a sealed jar
Not every moss enjoys a warm, permanently humid box. The ones that settle best are the low, creeping species you already find on shaded walls, logs and lawn edges.
- Sheet moss (Hypnum cupressiforme) — the classic choice, carpets quickly, tolerates being pressed flat.
- Fern moss (Thuidium tamariscinum) — feathery and softer in texture, slightly slower to spread.
- Cushion moss (Leucobryum glaucum) — rounded hummocks that give a build some height.
- Sphagnum — good for one wet corner, not for the whole jar.
Collect from your own garden, lawn edges or pavement cracks if you can. If you do take moss from the wild, take small patches from abundant areas, never from protected sites, and only with the landowner's permission. Shake off loose soil and check for slugs, snails and their eggs — a single slug can flatten a small terrarium overnight. A small culture of springtails, added after planting, grazes on mould and algae and does a lot of quiet housekeeping.
Planting and sealing
Work on a tray, with a spray bottle and tweezers to hand. Break the moss into pieces a few centimetres across rather than laying one continuous sheet; separate pieces knit together and settle faster. Press each piece firmly onto the substrate so its base touches damp soil, and leave a small gap between moss and glass. If you want more than moss, add one or two small companions — a miniature fern, a cutting of Fittonia, a liverwort — and keep the rest simple. Clutter blocks the view and competes for light.
Now water. Mist the moss and substrate until everything is evenly damp and you can see a little water sitting in the gravel layer. Let the jar stand open for an hour so excess moisture can escape, wipe any smears from the inside of the glass, then close it. In a sealed terrarium, that initial watering is nearly all the water it will ever need.
The first few weeks: reading the glass
Place the jar somewhere bright but out of direct sun — a north-facing windowsill, or a shelf a metre back from a sunny window. Direct midday sun will cook a sealed jar in an afternoon.
Then watch the condensation. A light mist that appears overnight and clears by mid-morning is exactly right: the water cycle is working. If the glass stays fogged all day, the jar is too wet or too warm, so open the lid for a few hours and move it somewhere cooler. If there is no condensation at all after a few days, mist lightly and close it again. Resist the urge to water on a schedule. The jar tells you what it needs.
Problems, and what they usually mean
- White fuzzy mould on moss or soil. Too wet, too warm. Remove it with a cotton bud, leave the lid off for a day, and check that the drainage layer is not flooded.
- Green film on the glass. Algae, from too much light. Wipe it off and move the jar further from the window.
- Moss brown and crisp. Not enough water, or a spell in direct sun. Mist and reposition.
- Moss yellowing under a permanently wet surface. Waterlogged substrate. Open the jar, lift the moss gently, and let things dry back a little.
- A sour smell when you open the lid. Stagnant, airless conditions. Rebuild the drainage layer rather than trying to rescue it.
Keeping it going
Never feed a closed terrarium. Fertiliser has nowhere to go in a system with no drainage, and it feeds algae and mould rather than moss. Trim any moss that creeps up the glass, remove dead leaves before they rot, and top up with a tablespoon of rainwater — not tap water, which leaves lime deposits on the glass, particularly in hard-water areas. Many builds run for six months or more untouched. When the moss thins or the substrate sags, empty the jar, refresh the layers and start again. It takes half an hour, and the second version is always better than the first.
Photo: magdakamyszek / Pixabay